DDNS Updater is a program to keep DNS A and/or AAAA records updated for multiple DNS providers.
If you've read any of my other posts, you'll notice that I have been searching for and using a few different DDNS updating solutions for years. You'll also notice that I love any projects that offer a Docker Compose solution.
Luckily, DDNS Upater fits both of these preferences.
Installation
To get started, always make sure to review the project's README. I'll be documenting my steps below, but they may have changed by the time you read this.
The first step is to set up the directories and files required for the project.
Configuration
The main configuration you need to update is the data/config.json file. There
is a large list of supported providers in the README, but I'm going to use
Cloudflare in this example.
When setting up the configuration for Cloudflare, you'll need the following:
- Required Parameters
"zone_identifier"is the Zone ID of your site from the domain overview page"host"is your host and can be"@", a subdomain or the wildcard"*". See this issue comment for context."ttl"integer value for record TTL in seconds (specify 1 for automatic)- One of the following (how to find API
keys):
- Email
"email"and Global API Key"key" - User service key
"user_service_key" - API Token
"token", configured with DNS edit permissions for your DNS name's zone
- Email
- Optional Parameters
"proxied"can be set totrueto use the proxy services of Cloudflare"ip_version"can beipv4(A records), oripv6(AAAA records) oripv4 or ipv6(update one of the two, depending on the public ip found). It defaults toipv4 or ipv6."ipv6_suffix"is the IPv6 interface identifier suffix to use. It can be for example0:0:0:0:72ad:8fbb:a54e:bedd/64. If left empty, it defaults to no suffix and the raw public IPv6 address obtained is used in the record updating.
{
  "settings": [
    {
      "provider": "cloudflare",
      "zone_identifier": "some id",
      "domain": "domain.com",
      "host": "@",
      "ttl": 1,
      "proxied": true,
      "token": "yourtoken",
      "ip_version": "ipv4",
      "ipv6_suffix": ""
    }
  ]
}
Once you have configured the provider of your choice, correct the file and directory permissions and ownership.
# Owned by user ID of Docker container (1000)
# all access (for creating json database file data/updates.json)
# read access only
Docker Compose
After creating the project structure, let's create the docker-compose.yml
file.
"3.7"
qmcgaw/ddns-updater
ddns-updater
bridge
- 8097:8000/tcp
- ./data:/updater/data
- CONFIG=
- PERIOD=5m
- UPDATE_COOLDOWN_PERIOD=5m
- PUBLICIP_FETCHERS=all
- PUBLICIP_HTTP_PROVIDERS=all
- PUBLICIPV4_HTTP_PROVIDERS=all
- PUBLICIPV6_HTTP_PROVIDERS=all
- PUBLICIP_DNS_PROVIDERS=all
- PUBLICIP_DNS_TIMEOUT=3s
- HTTP_TIMEOUT=10s
- LISTENING_ADDRESS=:8000
- ROOT_URL=/
- BACKUP_PERIOD=0 - BACKUP_DIRECTORY=/updater/data
- LOG_LEVEL=info
- LOG_CALLER=hidden
- SHOUTRRR_ADDRESSES=
restart: always
After configuring your preferences in the docker-compose.yml, launch the
container.
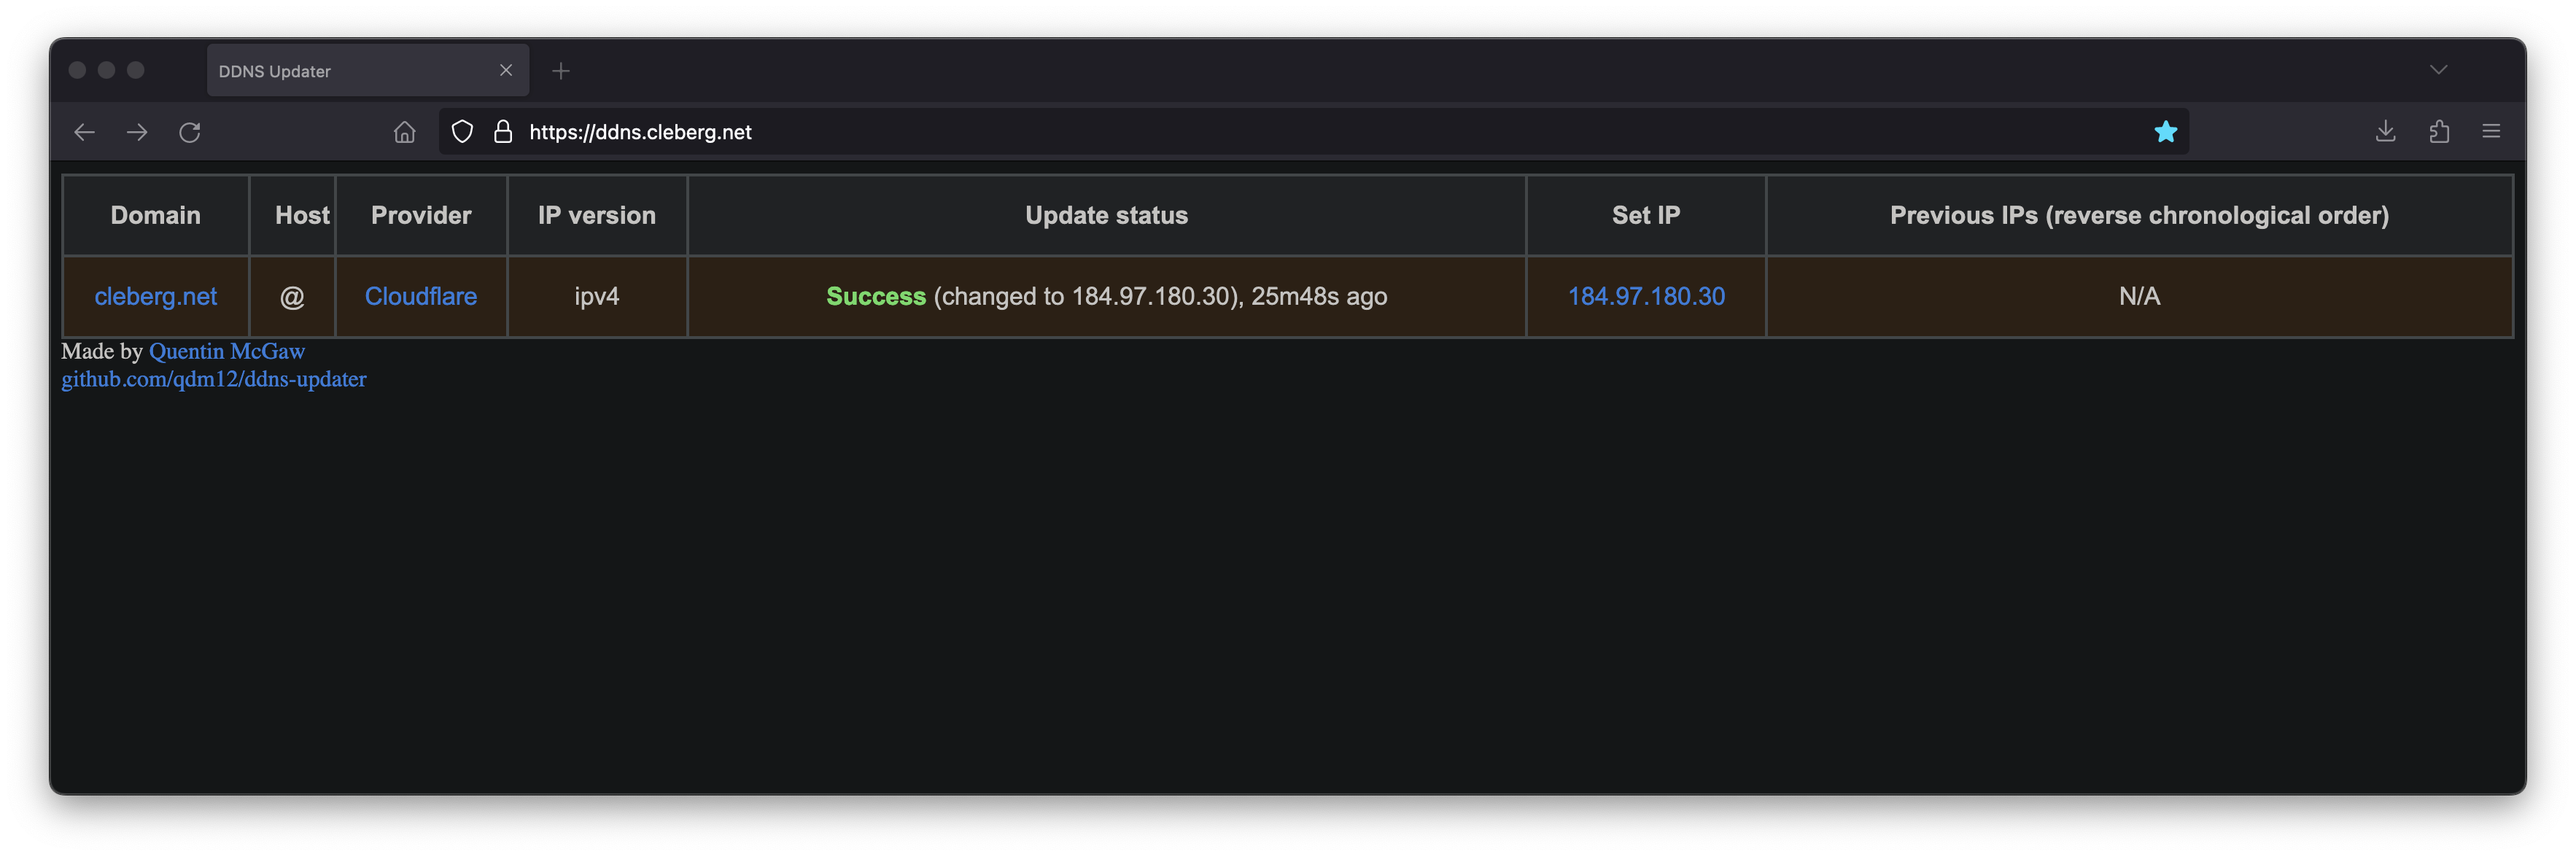
If you've launched this on your local machine, you can launch localhost:8097
in your browser to see the results.
Nginx Reverse Proxy
If you launched this service on a server, other machine, or just want to access it remotely via a domain name, you can use Nginx as a reverse proxy to expose the service publicly.
Start by creating the Nginx configuration file.
Here's a basic example that should work properly.
server {
[::]:80;
80;
ddns.example.com;
location / {
$upstream_ao ;
$upstream_ao;
}
}
Here's a full example that uses my Authelia authentication service to require authentication before someone can access the web page.
server {
if ($host ~ ^[^.]+\.example\.com$) {
301 ;
}
[::]:80;
80;
ddns.example.com;
404;
}
server {
[::]:443 ssl http2;
443 ssl http2;
ddns.example.com;
/var/log/nginx/ddns.access.log;
/var/log/nginx/ddns.error.log;
X-Content-Type-Options "nosniff";
X-XSS-Protection "1; mode=block";
X-Frame-Options "DENY";
Strict-Transport-Security "max-age=63072000; includeSubDomains";
Referrer-Policy "no-referrer";
/etc/letsencrypt/live/example.com/fullchain.pem;
/etc/letsencrypt/live/example.com/privkey.pem;
include /etc/letsencrypt/options-ssl-nginx.conf;
/etc/letsencrypt/ssl-dhparams.pem;
location /authelia {
internal;
$upstream_authelia ;off;
$upstream_authelia;
Content-Length "";
error timeout invalid_header http_500 http_502 http_503;
128k;
Host $host;
X-Original-URL $scheme://$http_host$request_uri;
X-Real-IP $remote_addr;
X-Forwarded-For $remote_addr;
X-Forwarded-Proto $scheme;
X-Forwarded-Host $http_host;
X-Forwarded-Uri $request_uri;
X-Forwarded-Ssl on;
http:// $scheme://;
1.1;
Connection "";
$cookie_session;
$cookie_session;
4 32k;
5m;
240;
240;
240;
}
location / {
$upstream_ddns ;$upstream_ddns;
/authelia;
$target_url ;
$user $upstream_http_remote_user;
$email $upstream_http_remote_email;
$groups $upstream_http_remote_groups;
Remote-User $user;
Remote-Email $email;
Remote-Groups $groups;
401 =302 ;
128k;
error timeout invalid_header http_500 http_502 http_503;
5m;
360;
360;
360;
Host $host;
Upgrade $http_upgrade;
Connection upgrade;
Accept-Encoding gzip;
X-Real-IP $remote_addr;
X-Forwarded-For $proxy_add_x_forwarded_for;
X-Forwarded-Proto $scheme;
X-Forwarded-Host $http_host;
X-Forwarded-Uri $request_uri;
X-Forwarded-Ssl on;
http:// $scheme://;
1.1;
Connection "";
$cookie_session;
$cookie_session;
64 256k;
}
}
When complete, simply link the file and restart the web server.
Your ddns-updater service will now be available via ddns.example.com!